How to Grow Your Own Avocado Tree

Avocados have been the fastest-growing food trend in recent years with over 2.6 billion pounds being consumed by Americans just last year. The avocado aesthetic has overtaken Instagram as well with over 1.6 million posts for the hashtag #avocadotoast. Why would the world be so obsessed with this fruit? Well, avocados have a lot of health benefits. They have healthy fats, tons of fiber, and a variety of nutrients, such as magnesium, potassium, and vitamin C. Although, avocados aren’t just healthy to eat, but amazing to look at. At Toasty, the very first avocado toast bar in San Francisco, we love the taste and looks of avocado on toast. Just look how delicious they are:

Keeping your feed updated with your latest avocado creations can be a bit pricey at times, so here are some tips and tricks to grow your own avocado plant. Whether you live in an apartment or a home, everyone can give it a try for some easy avocado growing.
Firstly some things you’ll need to get started:
- Avocado seed/pit
- Toothpicks
- Drinking glass or jar
- 10-inch pot
- Potting soil
- Trowel
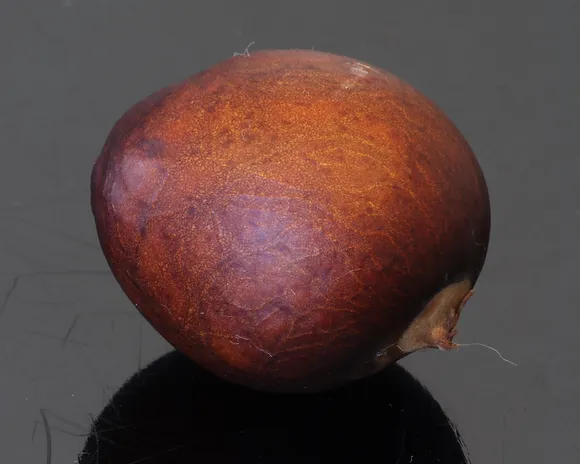
Step 1: Remove and clean the pit
Start by removing the seed from the avocado without cutting into it and washing all of the avocado fruit off. It might also help to soak the pit in some water for a few minutes before wiping all of the fruit off. The brown skin on the pit is very important for growth, as it is the seed cover, so try to keep it intact as possible, looking something like this:
Step 2: Identify the “up” and “down” of the seed
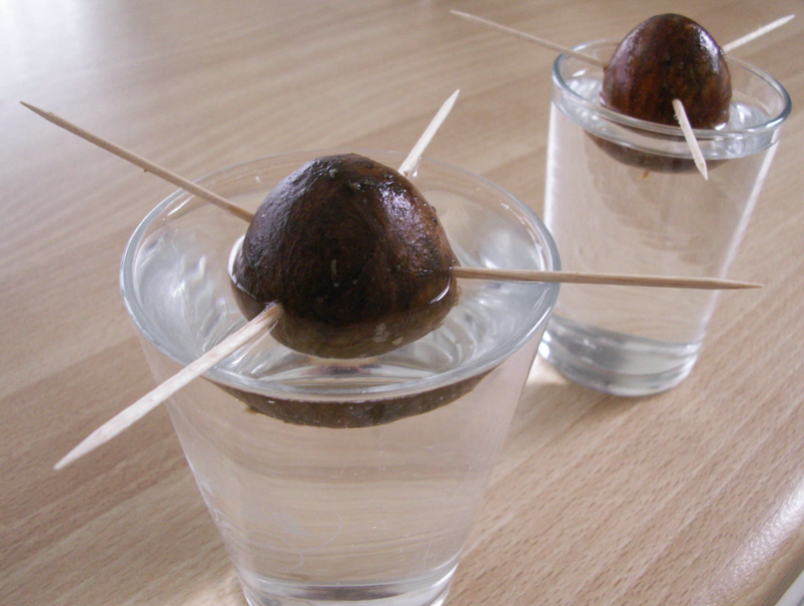
Avocado seeds vary in size from being a bit oval-ish to perfect spheres, but all avocado seeds have a “bottom” and a “top.” The “bottom” part of the seed is where the roots will sprout from, while the “top” part is where the sprout will grow. The slightly pointier end is the top, and the flatter end is the bottom. In order to get your avocado plant started, make sure the bottom root end is submerged in water.
Take three toothpicks and stick them at a slight downward angle into the avocado pit, spaced evenly around the avocado. These toothpicks will hold up the avocado to only allow the bottom half of the avocado to soak in the water. The slight angle downward will allow the avocado base to rest in the water when you set the seed over your jar or glass.
Step 4: Place seed half-submerged in a glass of water
Your toothpicks should rest on the edges of your glass of water or jar and set on a windowsill with sunlight. It might be helpful to use a clear glass, so you can easily see when roots start to grow and when to change the water. Through my own trial and error, it is better to change the water every five days to a week or so to prevent mold, bacteria, and fungus growth.
It should look a little something like this with the toothpicks and the glass:
Step 3: Pierce with three toothpicks
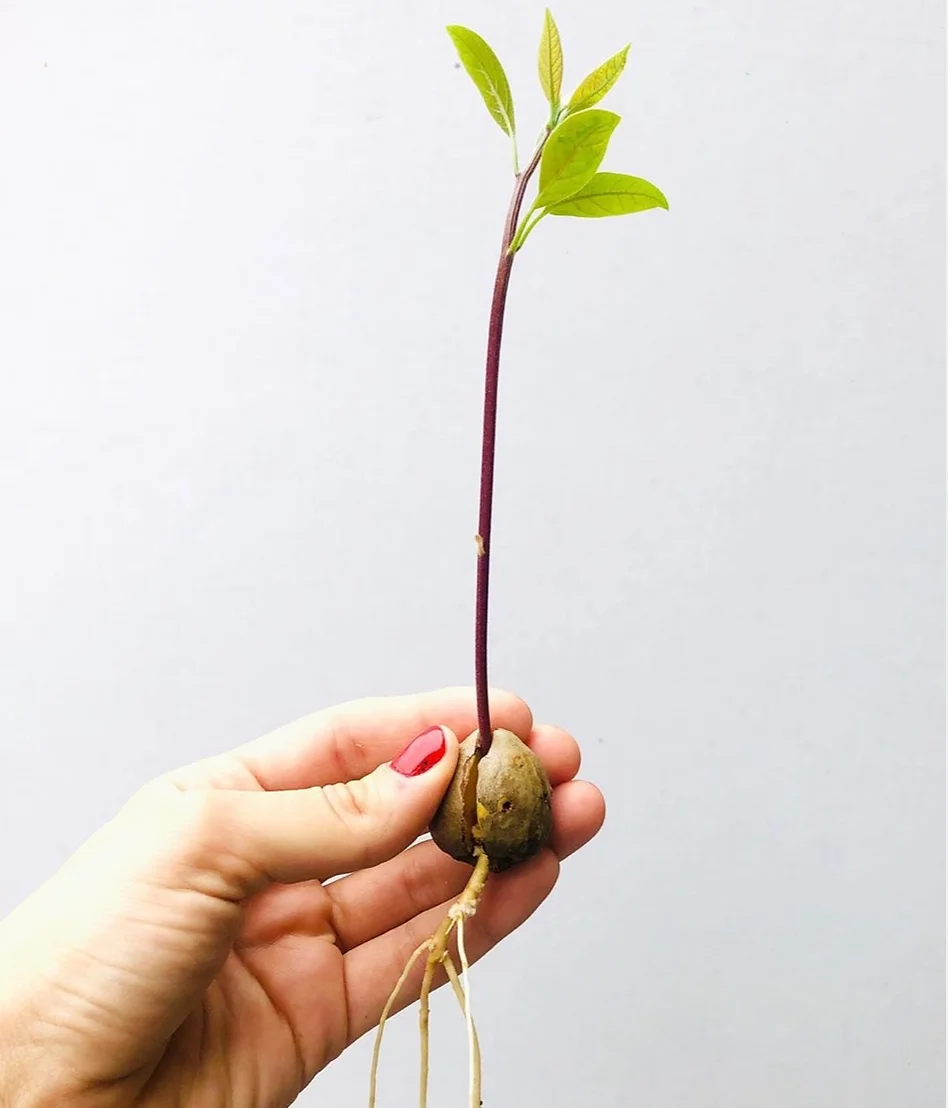
Step 5: Wait for your avocado seed to sprout
In our experience at Toasty, we found that it usually took at least 8 weeks to get a sprout.
Some things you will see as part of the process:
- The top of the avocado pit will dry out and form a crack (for the stem to sprout from), and the outer brown seed skin will slough off.
- The crack will extend all the way to the bottom of the avocado pit, and through the crack at the bottom, a tiny taproot will begin to emerge.
- The taproot will grow longer and longer, and eventually, a small sprout will peek through the top of the pit
- The taproot has to be submerged at all times, otherwise, it will die
Just look at the ones we are growing at Avotoasty right now:
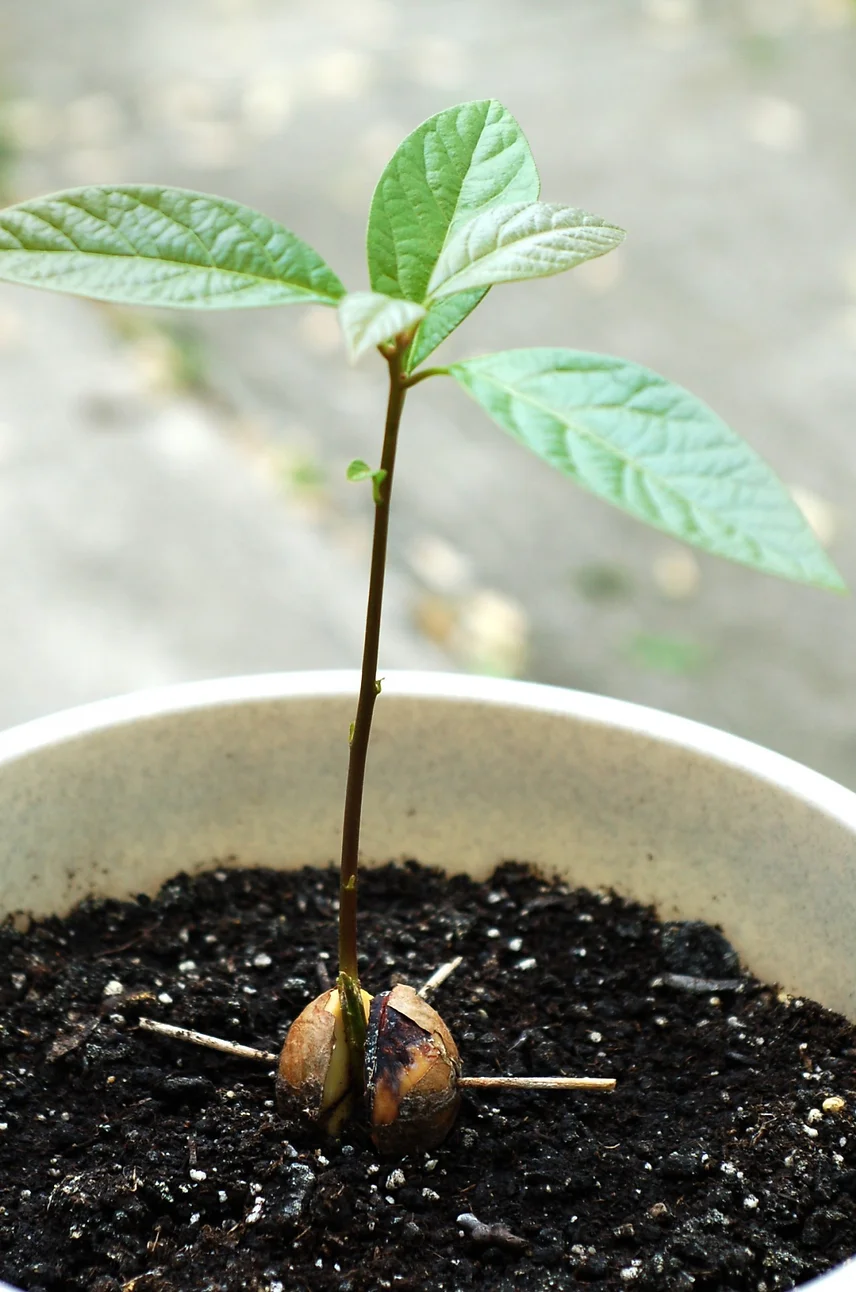
Step 6: Pot in soil when the tree is about 6 in. tall
When the stem reaches about 6 in. long, cut it back to about 3 in to encourage new growth. When it reaches 6 in again, pot it with rich humus soil with your 10-inch pot, leaving the top half of the seed exposed. Avocados love the sun – the more the better! Hopefully, it might look something like this:
Step 7: Water and watch it grow
Give it frequent waterings with an occasional deep soak every couple of days. The soil should be moist to the touch, but not completely saturated. Yellow leaves are a sign of overwatering, so let the plant dry out for a few days.
Step 8: Pinch out the top leaves
When the stem reaches 12 inches tall, make sure to pinch out the top two sets of leaves, as it will encourage the plant to grow even more branches and more leaves. Each time the plant grows another 6 inches, pinch out the two sets of leaves on the top.
How to Care for Your Avocado Tree:
- Bug problems: Avocado trees aren’t just delicious for humans but for bugs too, especially aphids that will feast on the leaves of your precious avocado tree. To get rid of them, wash all of the aphids off the plant. Once the bugs are gone, spray your plant with a mixture of water, a small squirt of dishwashing liquid, and a teaspoon of neem oil. This will keep the aphids from returning
- Wintering: Baby avocado trees can live outdoors during the summer months, but if you live anywhere cooler than 75 degrees Fahrenheit, you’ll have to bring them back indoors in the fall or winter before the temperature drops. San Francisco can get super cold during the winter and spring months, so you should definitely bring your avocado babies inside.
In short, it is not too difficult to grow your own avocado plant. Just use that avocado pit that you usually throw away after making your avocado toast. I hope you enjoyed this article and are even more hyped about avocados. If you don’t feel like growing your own, at Avotoasty, you can enjoy our own delicious avocado toast al fresco, while pairing it with your favorite coffee.
